 Loading... Please wait...
Our Newsletter
- Home
- Activation Guide
- Activation Guide Home
Activation Guide Home
Activating your Cryoguard™ Indicators is a simple process that involves freezing the indicator, depressing the pin for activation, and re-freezing the indicator after activation. On this page you will find an overview of the activation process. This will lead to your success with Cryoguard Indicators. Remember to wear safety glasses and insulating gloves when handling indicators.
For detailed directions on indicator activation, click here.
Preparing the Indicator
All indicators must be frozen before they are activated. Indicators should be frozen at the freezing temperature (which is more than 25° C below the signal temperature) for a minimum freezing time. Once removed from the coolant, they must slightly thaw before activation. After the pin is depressed, the indicator must be re-frozen at the re-freezing temperature for the minimum re-freezing time. Freezing and re-freezing temperatures and minimum times as well as thawing times are found on the Package Insert, on each indicator's product page, or in Table 1 at the bottom of this page.
Depressing the Pin
To activate the frozen indicator, the pin must be pushed into the indicator until it is flush with the body. There are three methods that can be used when activating Cryoguard Indicators.
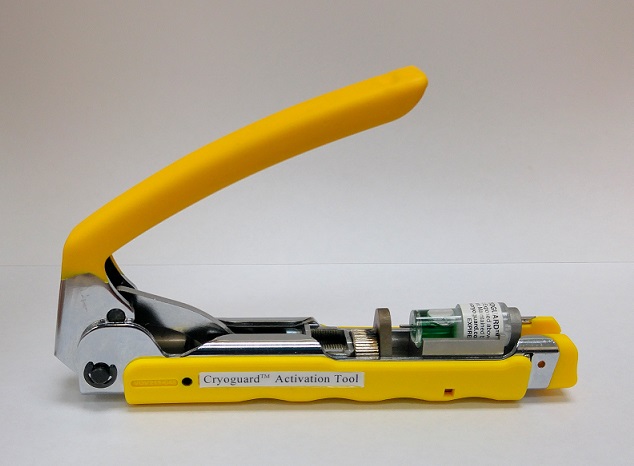
Method 1: The Cryoguard Activation Tool. This method yields the highest success rate with indicator activation and is highly recommended. Our activation tool is required for activation of the M-135 and M-150 models.

For more information on how to activate an indicator on and off a freezer cane, please see the following link:
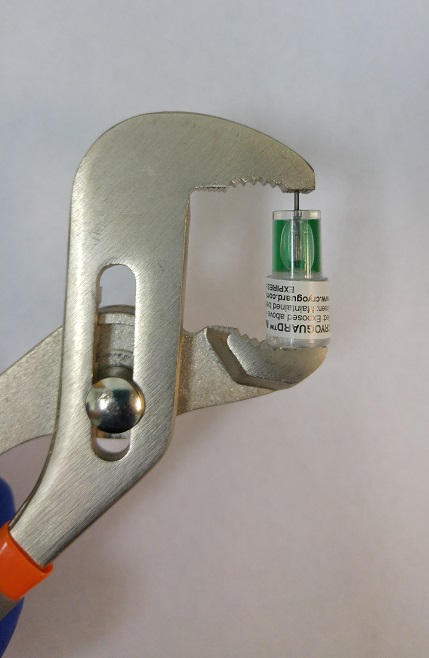
Method 2: Channel lock pliers. This method provides a convenient and rapid way of activating the indicator while preventing thermal exposure, which also makes this method have a high success rate.

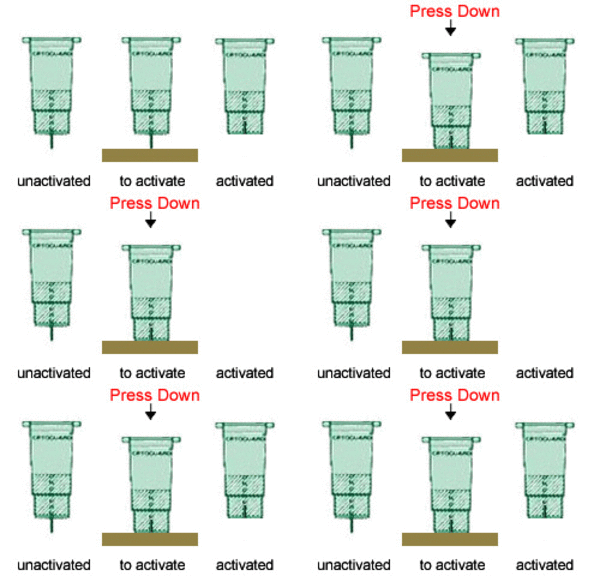
Method 3: A hard surface such as steel or concrete. This method requires no tools but can easily produce a premature color change in the indicator, and therefore has the lowest success rate. Do not use a hammer or a high impact device to drive the pin into the frozen indicator.

For more information on activating indicators using Method 2 and Method 3, please read the General Activation Guide here.
Handling the Activated Indicator
Indicators that are not activated can be stored at room temperature. Activated indicators must be stored at the appropriate temperature. All indicators should be discarded after their expiration date.
For any further questions reguarding indicator activation, please contact us.
Table 1: Freezing and Thawing Times Pre- and Post- Indicator Activation
| Indicator Model |
Freezing Temp. (°C) |
Minimum Freezing Time (min) |
Thawing Time (s) |
Re-Freezing Temp. (°C) |
Minimum Re-Freezing Time (min) |
| M-40 | -78 (dry ice) | 60 | 5-15 | -78 (dry ice) | 60 |
| M-40 | -65 | 60 | 0-10 | -65 | 60 |
| M-40 | -196 (LN2) | 5 | 50-60 | -196 (LN2) | 5 |
| M-70 | -95 | 60 | 0-10 | -95 | 60 |
| M-70 | -196 (LN2) | 5 | 40-50 | -196 (LN2) | 5 |
| M-100 | -125 | 60 | 0-10 | -125 | 60 |
| M-100 | -196 (LN2) | 5 | 30-40 | -196 (LN2) | 5 |
| M-120 | -196 (LN2) | 5 | 30-40 | -196 (LN2) | 5 |
| M-135 | -196 (LN2) | 10 | 15-25 | -196 (LN2) | 10 |
| M-150 | -196 (LN2) | 10 | 5-15 | -196 (LN2) | 10 |
